With the completion of the Burke propeller base Tulip chair two days ago, I have now, finally, completed Carroll’s nursery – and not a day too soon. Literally. He turns one tomorrow. Months ago I told myself I would get his room completed and shared on my blog before he turns one. Good thing it was a sunny morning for photos.
My wife and I worked really hard in designing this room and it has held up quite nice as our newborn has turned into a toddler, very soon to be a walker. We took great care into designing every single detail with thought and pride. We knew we didn’t want this room to look like other nurseries, and we despise the look of what’s available at the big box baby stores. The solution: build it ourselves. Of the seven pieces of furniture in his room, five of them were built, rebuilt, or repurposed almost from scratch by me, with upholstery assistance from my mother. The remaining items were sourced out and the accent pieces hand made or picked by fellow artists and siblings.
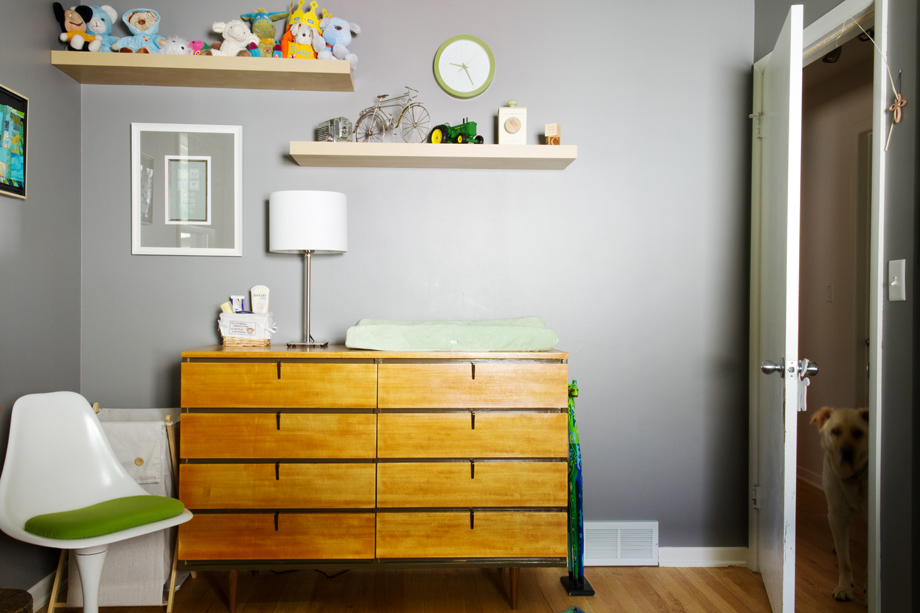
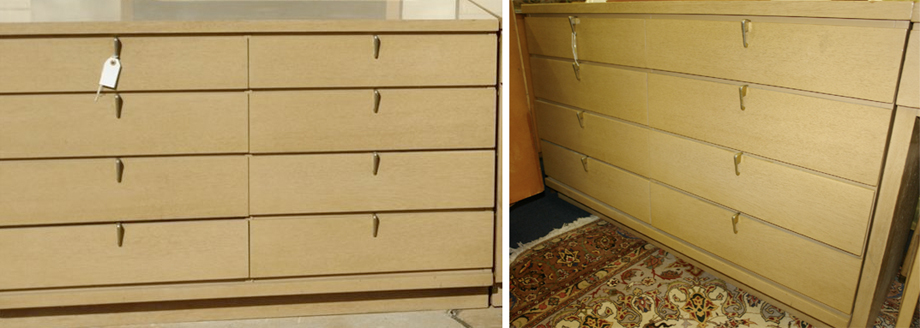
This dresser was the very first item we decided was going to go into his room – before we even got pregnant. Sarah had bought it at a second-hand store years before and it was beat up. It’s made by Johnson Carper sometime int he 60s. It had a blonde finish on it that had gotten cloudy, the veneers were chipping at the bottoms and peeling off, there were cigarette burns allover the surface and a bit on the sides, and it had a big chunky solid base on it. I ended up sanding all off the old finish and burn marks. I was able to get about 95% of the burns without going through the thin veneers. I cut off the base and added midcentury style black walnut legs, painted the facing to match the patina on the pulls, and finished it with a clear golden poly. I am very happy with how it turned out. I unfortunately don’t have photos of my original, but found some online of what it would have looked like brand new had it been taken care of.
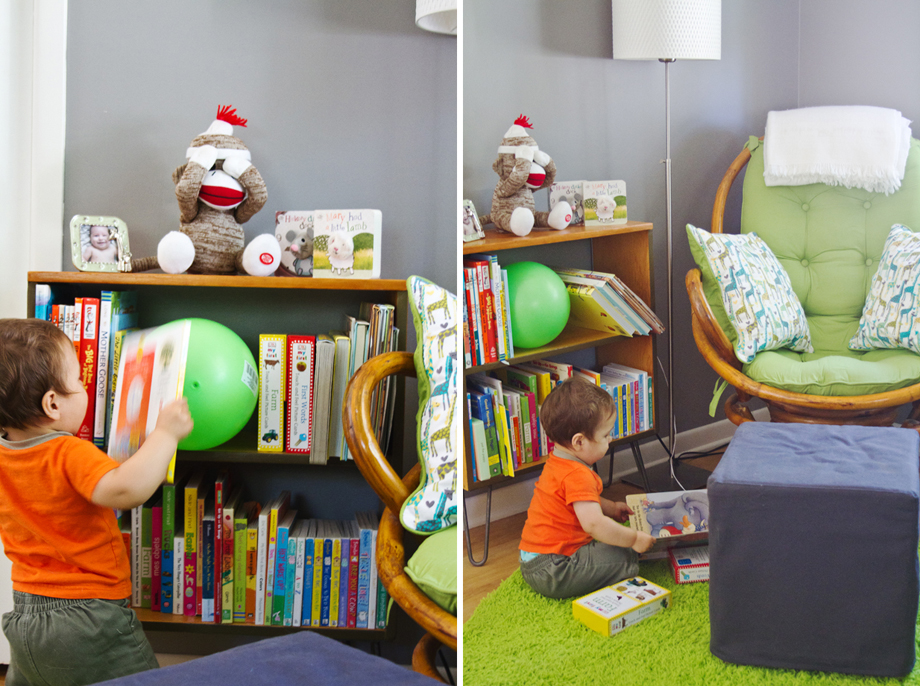
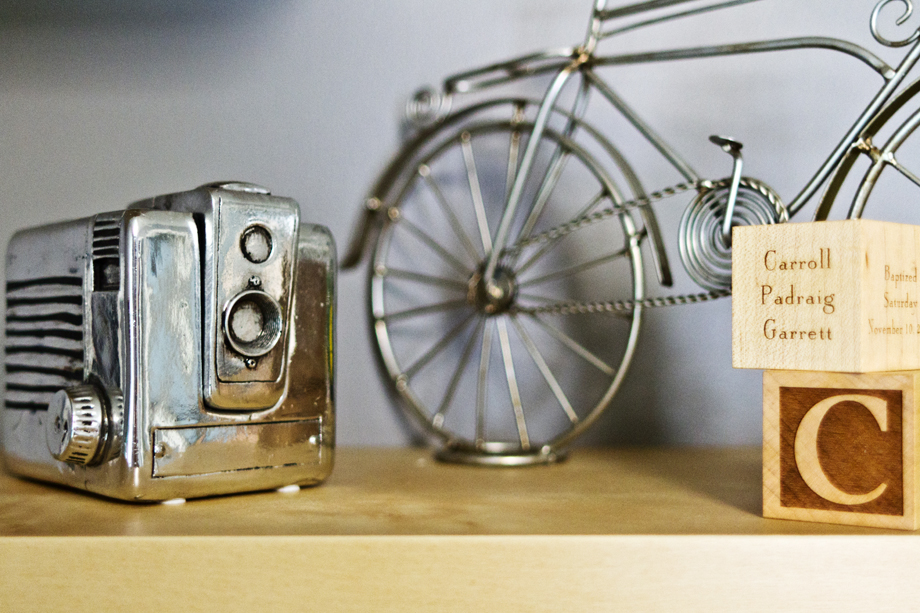
The clock was originally below the shelf, but we learned quickly that Carroll can throw it across the room during a diaper change. The shelves and lamp are from Ikea, the majority of the stuffed animals were mine as a child, the bike represents Sarah, and the silver view camera represents me. It even took us a long time to find a hamper we agreed on – buying a floor model on clearance not to be found ever again type of hamper. The wall color is called Cement Gray by Martha Stewart?!? The cross-stitch on the wall was made by Sarah’s older sister and has Carroll’s full name and date of birth.
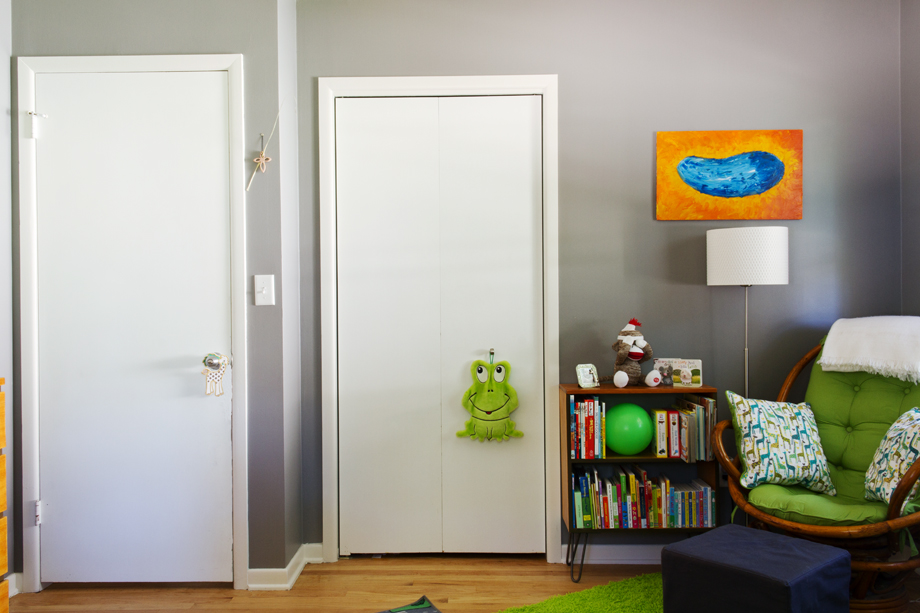
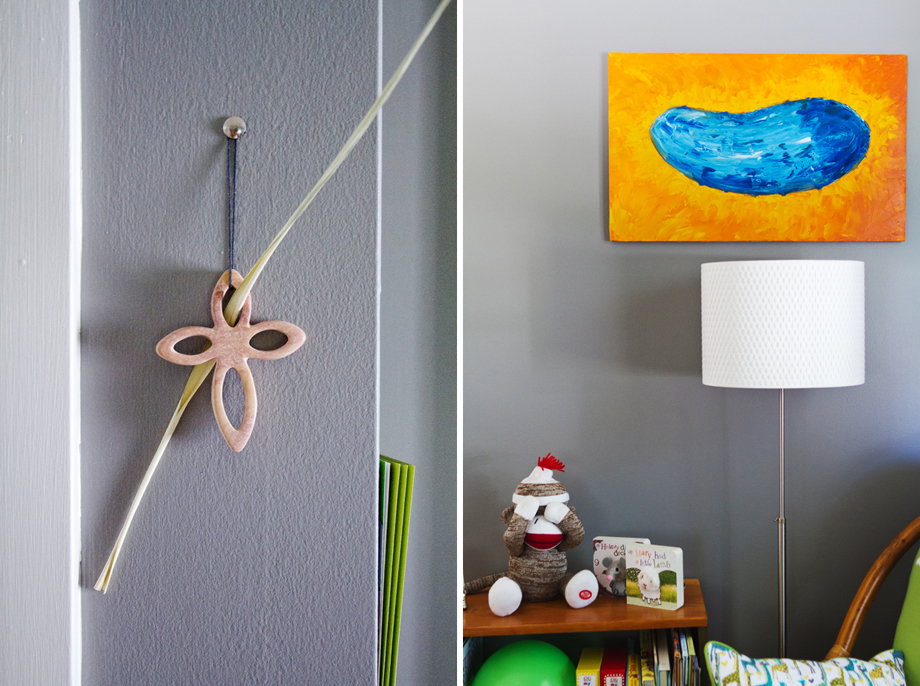
Again, matching lamp from Ikea. Footstool from Ikea. Frog on the closet door is actually a water heater rubber bottle for use in warming a bed. It was Sarah’s from when she lived abroad in France. The cross between the doors was picked by Sarah’s middle sister as a baptism gift. She said she struggled to find one that worked for our style as so many were tacky. She ended up settling on what turned out to be carved stone, and in fact it’s a Christmas ornament! The blue pickle is a random painting that was made by my sister. She is a talented oil painter and I found this in her inventory, thought it would be perfect in Carroll’s room, and she let me have it. In the closet (which we keep open 99% of the time, is another cross-stitch from Aunt Lisa. It is a mother and baby giraffe. She made it herself and left it unframed so we could do as we pleased – which we have yet to do (sorry Lisa!) but it is seen daily  and will get done soon.
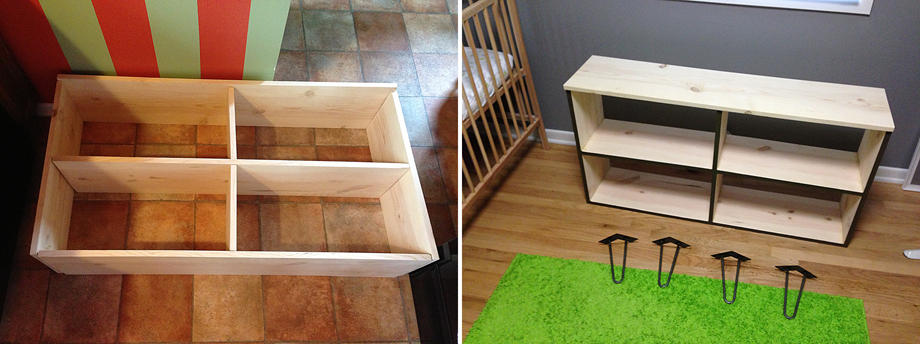
The bookshelf was my first complete recreation/repurpose on a piece of furniture that you would never guess in a million years that the before was the same piece as the after. See below for before photos. It was a simple 3-tier bookcase that I hacked the bottom off of, sanded to original wood, painted the facing to match the dresser, and added [my new favorite to work with] 3/8 thick 8″ hairpin legs (I got the legs from hairpinlegs.net – which was awesome to work with – but they seem to be MIA right now?!?). The 3/8 vs 1/4 gauge really ads some nice weight and girth to the legs making it really sturdy. I love love love those legs. I put the same poly on the bookcase as I did the dresser – they match quite nicely I feel.
The rocking chair is another old chair that was just sort of lying around for the last 30 years or so. It had beeb retired to the cottage, then retired from the cottage to our basement, then modified and placed in the nursery. It was a great old bamboo chair, it just needed some love. To begin, it was a little too short for a brand new mommy to be getting up and down comfortably so I dismantled a bamboo footstool and took the parts from it, sanded and stained it to match, and added it to the bottom. Also, the rocking mechanism was a poor design, so I took it apart and raised it as well, tripling the rocking range of motion. Over all I raised it about 6″ – which, combined with the longer rocking motion, altered the center of gravity!! Oh Know! When you rocked backwards, the whole thing tipped backwards. I did what any good sport would do – I added a wheelie bar to the back, and blended it in to match the flooring. It worked like a charm! With a fresh cover on the cushion from “Grandma Garrett” it was ready to rock! Literally!
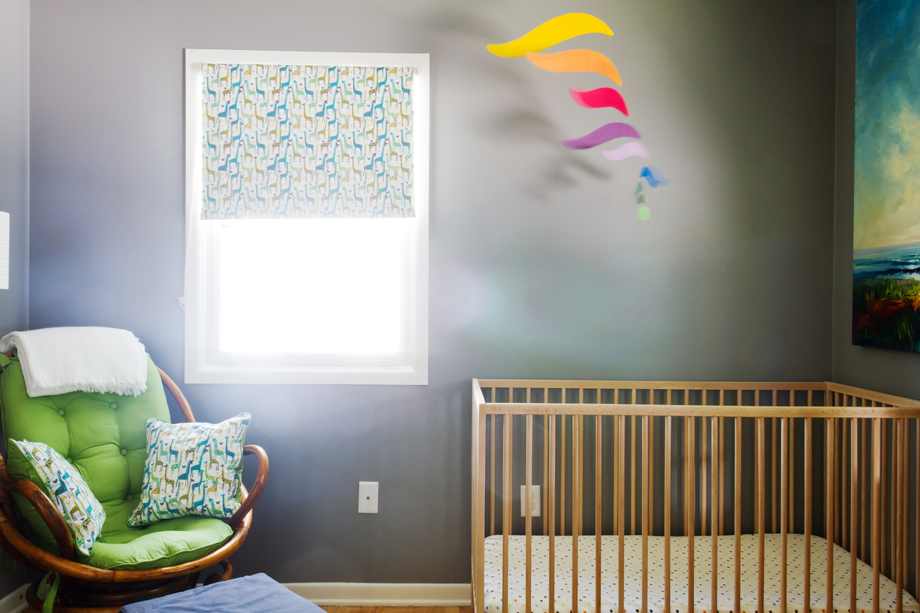
My mother also recovered the pillows, made the curtains, and wove that blanket on a loom! Seriously, she has a huge 5′ wide loom with a shuttle that she throws and everything. It’s pretty impressive. The mobile was made locally by hand and purchased from the children’s boutique, Hop Scotch Children’s Store. Best place in town for organic and hand made baby and children’s paraphernalia (with a great staff too). We really didn’t like the mobiles that were readily available all over the place, and we are huge fans of Alexander Calder (but cannot afford Calder reproductions), and thought this one was very similar and very affordable (Carroll loves it, too!).
Picking a crib turned into something more than I would have imagined. Obviously there are lots of safety issues that you need to be aware of, but there was also design and function to keep in mind. Everything in the room was becoming simple, airy, and not overly big. All the big box baby stores carried was tacky, gaudy, oversized and overpriced cribs that I did not like. Somewhere along the line I decided two things: I wanted round rungs, and I wanted all four sides to be runged (vs the ends being paneled). The end panels can really close things down and I did not want any extra confinement – I wanted to continue the open feel in the room. With my two requirements, we actually were left with a very small amount of cribs to pick from. Once again, Ikea came to the rescue and we love the crib. It’s simple, classic, very functional, and fits the room’s vibe perfectly.
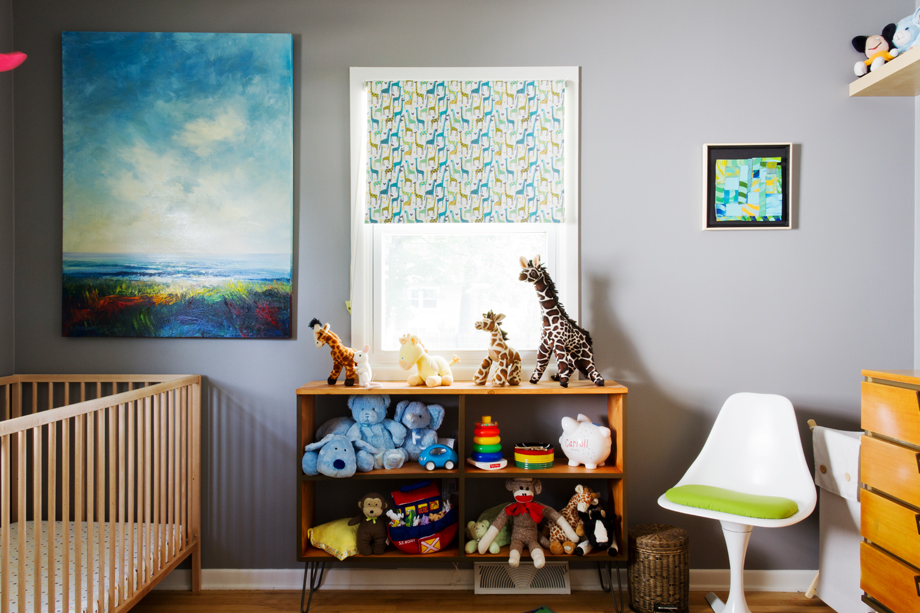
After the success of the bookcase, I decided I wanted another item to match it and the room’s feels. Based on that design, from scratch I built a double case for his toys. It’s an incredibly simple form but it’s super effective, sized it to fit perfectly under the window. Since the wood I used to build this was brand new vs ancient, I went with a pecan stain and think it matched up pretty well. With the dresser, bookcase, and toyshelf all matching one might think it was a set, but nnnooooOOOOoooooo – the only thing I had to buy was legs and a little bit of lumber. I’m very happy with how all three pieces turned out.
The landscape painting is by local artist George Peebles, a friend of my wife. We were able to hand pick this piece from his collection. It was a thrilling experience going through his inventory and he is a very interesting man. Ultimately we chose this one not only for the space we needed it to fit, but it reminds us specifically of her family’s cottage, and our place at The Quarry. We wanted it there over Carroll’s crib so he could also fall in love with the beaches of the Great Lakes as we have.
The square piece to the right is by South Carolina artist Deanna Bowdish – another great friend of ours from over the years. Sarah and I tend to barter or exchange good for work whenever we can – that is exactly what we did for this piece. She had a new body of work up here for ArtPrize and had me document it. In exchange we brought up this piece from her inventory. We’ve had it since before we were pregnant and didn’t know what we were going to do with it. Turns out it was perfect in this room!
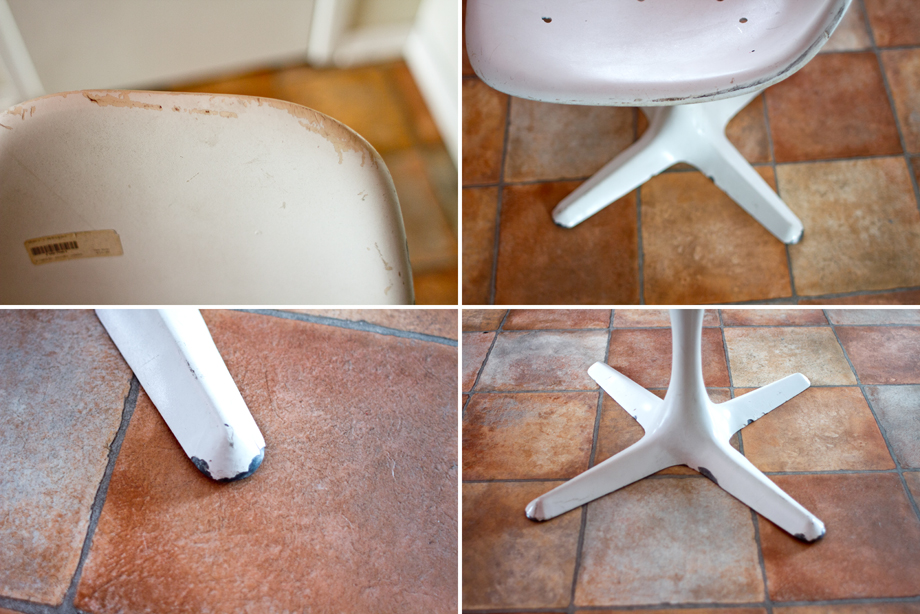
The Burke chair was a challenge. The rehab process took me a looooong time but only because I was also working on a million other things and procrastinating on others, like this. But, as usual, I love the way it turned out. So much so that I’m going to do an entire post dedicated to just the rehab process of that chair. In my research to do so, I learned there is very little information out there of rehabbing fiberglass chairs, and even less on white fiberglass. Additionally, rebuilding the cushions for these chairs seems to be a very popular question but with little answer. There is the special order route but those are terribly expensive. I built mine my cushion from scratch, custom fit, in a few days for probably less than $10 total. In all, I think I have less than ~$30 invested in that chair. Boom. Stay tuned for a white fiberglass chair and cushion rebuild tutorial post (man, that chair was a dump before).
My mom made that sock monkey
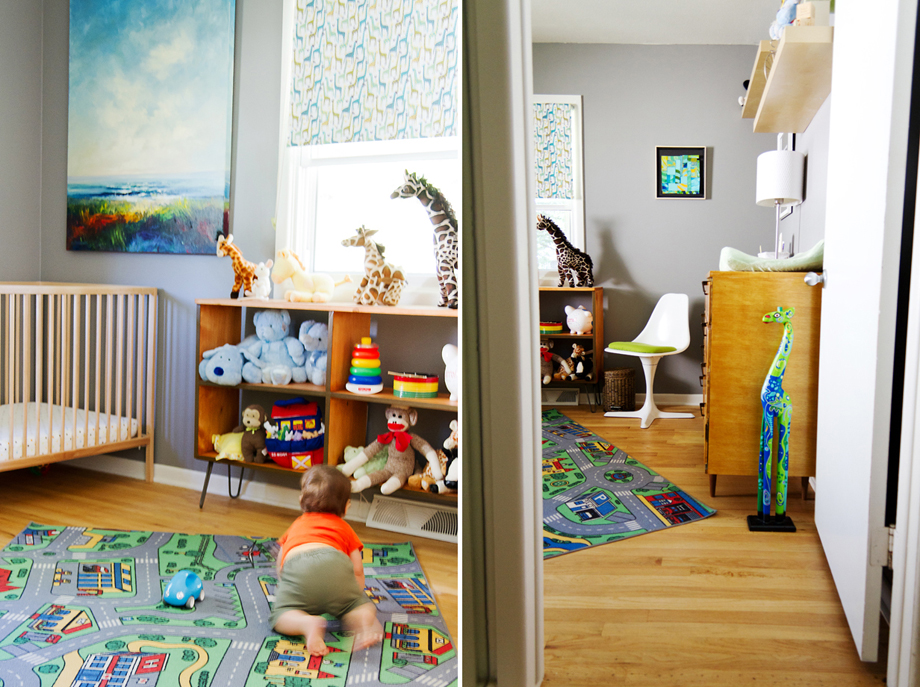
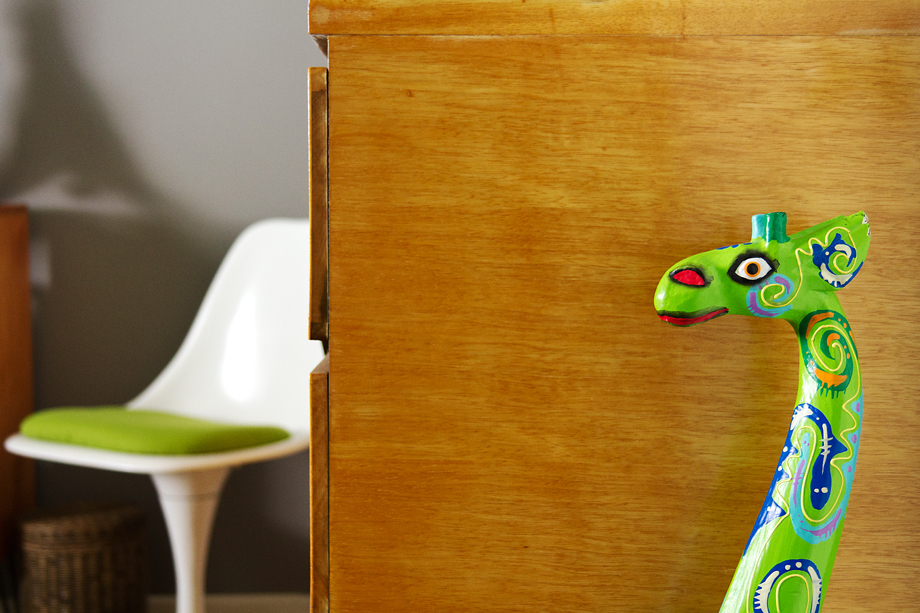
Carpet City and strange tall colorful floor giraffe were thrift store and clearance items

A little before action……
The dresser: found this image online – same color as mine was originally, but mine was in terrible condition
The bookcase: can you believe the transformation? This shot is mid-sanding and cutting

The toy shelf: not too shabby, eh?
The Burke chair: more coming up….